
Navigation Settings
To use the navigation feature in the Responder app, you must first select the desired navigation app.
- Tap the Navigation icon in the Details tab to display the available navigation options on your mobile device. For example, you can select Waze, Google Maps, or Apple Maps here.
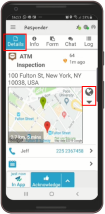
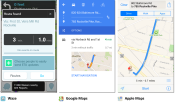
- Select the desired navigation app. If you don’t have any navigation apps installed on your mobile device, go to your device’s app store to download the navigation apps. The selected navigation app will then open with both the current device location and the incident location preloaded.
Navigating to the Incident
Once you have selected the desired navigation app, you can navigate to the incident.
- Tap the Navigation icon in the Details tab to display the available navigation options.
- Select the desired navigation app.
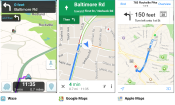
- The navigation app opens and displays the route from your current location to the incident.
Returning to the Responder App
To return to the Responder app, bring it back to the foreground on your mobile device.
Note: The exact steps for returning to the Responder app may vary depending on the type of mobile device you are using.
Once you are back in the Responder app, you can continue handling the incident.